Friday 21 February 2014
At Home Sew Along Skirt
Step 1. I have decided to make the Great British Sewing Bee pencil skirt for the sew along. It is featured in the March issue of Sew magazine. I downloaded the pattern - 12 pages - and pieced it together on my dining table.
Thursday 20 February 2014
Skirt sew along cont.
Step 3. I have chosen the fabric - a medium / heavy weight embossed navy blue. It looks a bit lighter in the photo.
I even made a muslin from an old sheet.
Step 4. Six darts to sew.
Then I had the urge to line the skirt and found some bright red lining fabric in my stash.
Step 5. Lining made and I attached it to the waist edge before attaching the waistband. I did not use interfacing on the waistband as this fabric is quite heavyweight.
Monday 17 February 2014
Zip and finishing touches
1. Now to insert the invisible zipper. First I like to press the zipper teeth flat as this makes it easier to stitch nice and snugly next to the teeth. I also overlocked the raw edges of the skirt before placing the zip with the coils along the seam line. Then I stitched one side of the zip going slowly to avoid puckering ( normally I am a bit of a speed merchant on the machine!) Once that side was done I did the other side, remembering to keep the zip face down and to work on the right side of my fabric. I then stitched the rest of the seam from the hem up and overlapped where the zip stitching ended. A final press and voilà. There are much better instructions than mine for inserting an invisible zipper - I like Sew Serendity's at blogspot - really clear instructions and photographs.
2. Next step is the lining. I attached this to the waist edge, so no need for any waistband or facings.
The final dilemma - to add a decorative trim or not? I am addicted to trims but am reliably informed that less is more. Mmmm?
3. The finished article - as you can see I succumbed and added a hemline trim.
Grey skirt in construction.
I found it necessary to stay stitch the waist edge as this lovely soft fabric is slightly stretchy and I don't want puckers. It has 2 darts back and front. The best way to get a neat finish to darts is to end the stitching at the point end and go a few stitches beyond, do not reverse stitch but pull the stitches through to same side and tie off. Then press, press and more press.
First project of the week
Hello fellow sewists! I am about to begin my new sewing project - nothing too exciting - just a simple skirt for work. My wardrobe is in dire need of refreshment and I wear the same old, same old......
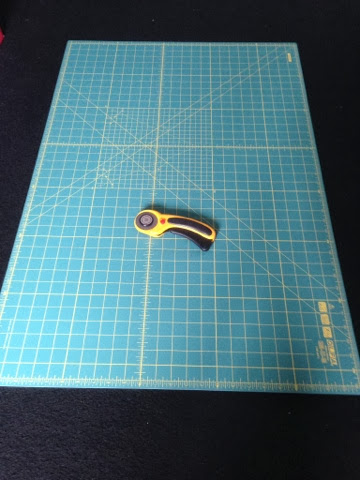
I bought this fabric from Walthamstow market, the man outside Sainsburys ( to be known in future as TMOS) actually I think I am in love with him, his fabric is A-May-Zing! It is a lovely soft grey wool mix with a super drape and I lashed out and bought some burgundy lining at the heady price of £1.00 per metre! I know - it was extravagant of me ;) I also purchased a cutting board ( never had one before) and a rotary cutter ( jury still out on that). I am looking to buy a dress form but am still trawling the net for ideas and comparisons. If anyone has any suggestions or tips I would be hugely grateful. Well, the machine is calling.......
Wednesday 12 February 2014
Welcome sewists!
Hi fellow sewists. My name is Jan and I am a sewist. I love making clothes, accessories and home furnishings - anything in fact. I am addicted to reading sewing and craft blogs - sew time to join the bloggers myself. (ha!)
I am going to post my creations as they take shape and look forward to your comments and tips.
I am going to post my creations as they take shape and look forward to your comments and tips.
Subscribe to:
Posts (Atom)


